We're an affiliate
I hope you love what I recommend! Just so you know, I may collect a share of sales or other compensation from the links on this page at no extra cost to you. Thank you if you use my links, I really appreciate it!
Just as for mother’s day, I decided to make some DIY Father’s Day Gift Ideas. I love holidays and birthdays because they bring me the opportunity to spend time creating handmade thoughtful gifts for my loved ones. I will try my best to explain every step of the way as thoroughly as possible. For these gifts, I wanted to have a superhero element and an elegance element. They are quite simple looking and can be customized to your preferences, or in this case, to your dad’s preferences.
Embroidered Superman Keychain
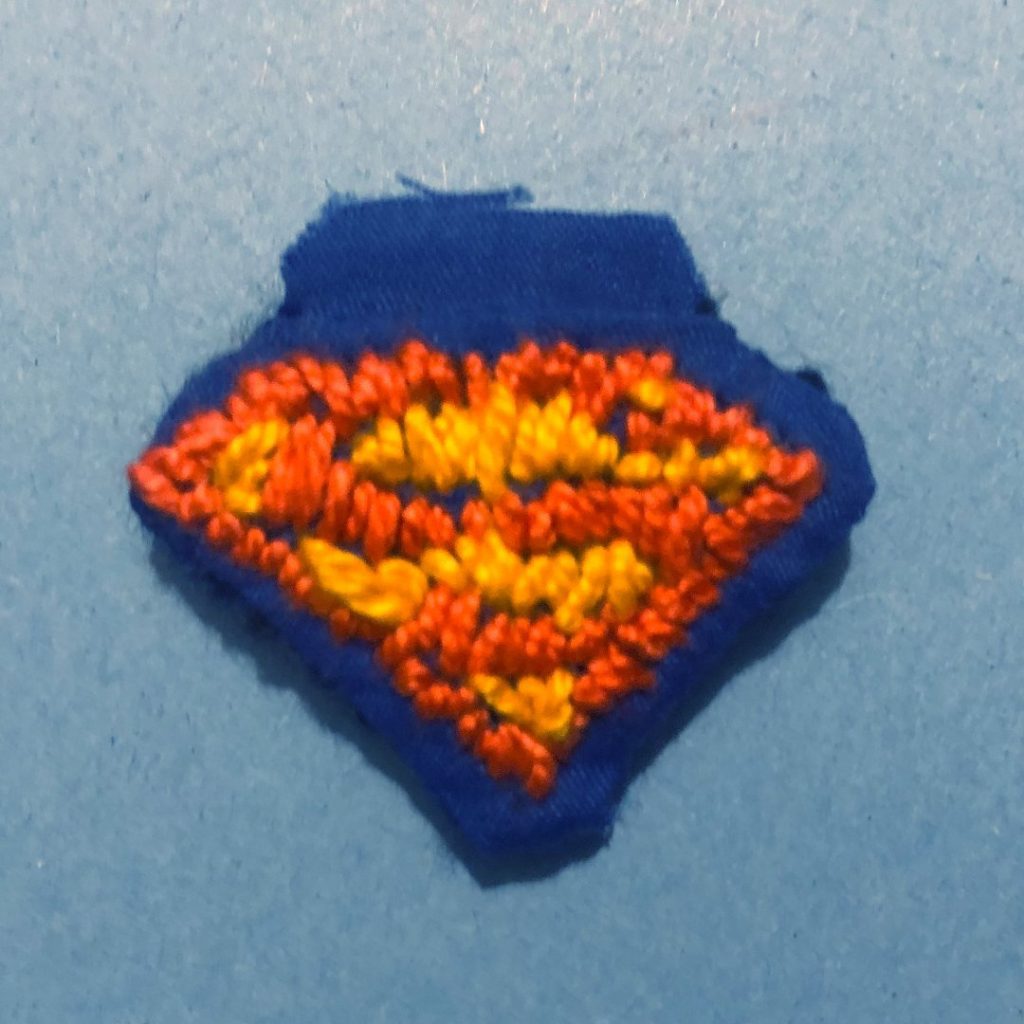
My dad’s favorite superhero is superman. I wanted to make this keychain to not only represent his favorite superhero but to also show that he is one of my superheroes.
Materials
- Sewing Kit
- Embroidery Thread
- Scissors
- Pen
- Paper
- Cotton Fabric
- Felt Fabric/ Paper
- Phone Keychain String Hoop
- Hot Glue
- Ribbon
Process

I never said I was good at embroidery… 

And TA-DA!!!
- The first thing I did was sketch out Superman’s logo on a piece of paper. I also did the main shape of the keychain to trace it over the fabrics.
- I traced the outline of the keychain on the cotton and felt fabrics and cut around it leaving about 1 cm of extra space around.
- Then, I sketched lightly the logo on the cotton fabric with a pen.
- I went on to embroidering the logo, first with red, and filled in the gaps with yellow.
- After that, I connected the cotton and felt fabric with the superman logo inwards so that I could flip the fabric later on.
- I did a simple stitching through the main outline leaving the top part of the logo.
- I cut the excess fabric from all the stitched parts and flipped the whole thing.
- Lastly, I made a loop of thin ribbon with a phone keychain string and glued it alongside the top part of the keychain I had previously left out.
That’s it for the embroidered Superman keychain. If you have any questions feel free to leave them in the comments.
Cardholder
For the elegant gift, I decided to make a simple cardholder. I can be used for quick grocery runs, to go to the cinema or for everyday use. The good thing about this gift is that it can be easily customized.
Materials
- Sewing Kit
- Ruler
- Pen
- Ribbon

Process
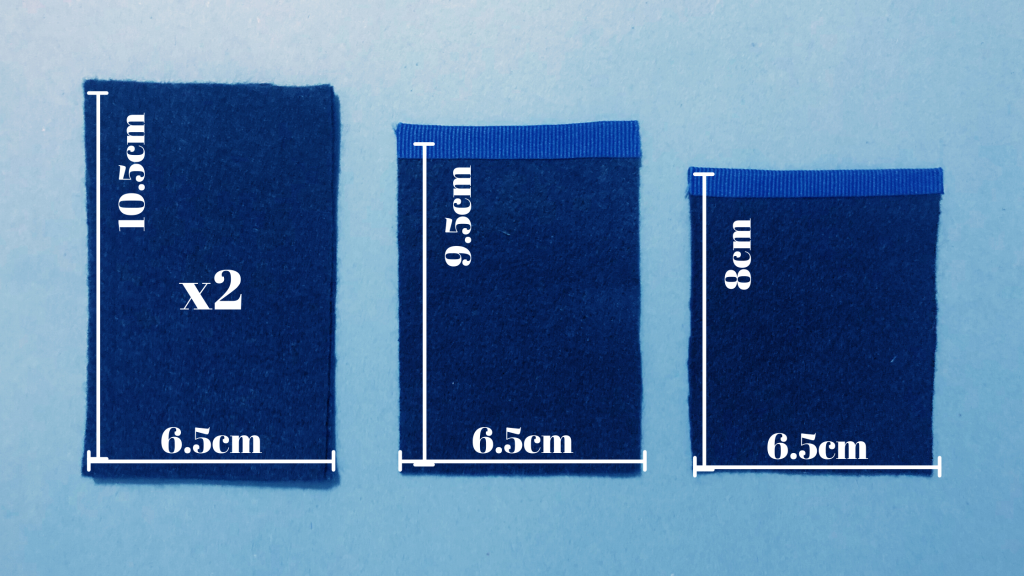
- First, I measured the cards and traced the measurements leaving about 0.5 to 1 cm of space all around. I also made sure to know the number of card slots I was going to put to make sure I left enough space vertically on the main piece of the cardholder. Since I wanted to go with two card slots to keep the look simple and minimalistic I just added about 2 cm more to the main pieces.
- After that, I cut a piece of plain cardstock a bit smaller than the main pieces to add more structure to the cardholder. I glued it with a glue stick and let it sit while I was working on the pockets.
- I moved on to folding the ribbon on the top part of the pockets to avoid the edges coming off.
- I then put a hot glue line a little bit higher on the bottom of the main piece to make sure that the cards don’t slide in too much in the larger pocket.
- Lastly, I stitched all around the wallet uniting all the pieces and making sure the edges of the cardholder are clean.
- You can add another logo if you feel like it, I just thought that it kind of ruined the simple, elegant minimalistic look I was going for.

Again, if you have any questions, let me know in the comments.
I hope you liked this blog post and found it helpful. To all the amazing dads in the world, including mine, Happy Father’s Day! Thank you for being you and being my superman.
If you want to see more content like this and get access to a free printables library, make sure to subscribe to my weekly newsletter and check out my social media.
Be Yourself, Be Happy, Be Human.
Lots of Love, Patrick.


I was the fortunated Dad who receive this as a Father’s day present!! Love you daughter❤️🥰!!
Love you too!!!😘✨