We're an affiliate
I hope you love what I recommend! Just so you know, I may collect a share of sales or other compensation from the links on this page at no extra cost to you. Thank you if you use my links, I really appreciate it!
The title is right I made a full-on desk organizer to put on top of my bookshelf in my office/bedroom. I wanted to create an organizer that had everything I could need; vertical and horizontal filing, and drawers and pencil cups for supplies. I will try my best to explain every step of the process of this DIY Desk Organizer in a comprehensive way.
The first thing I did was brainstorm my plans keeping in mind how much space I had to put the organizer (to be honest, I checked out the measurements of the display after getter all the measurements of the organizer and it thankfully matched up with the space).
Supplies/ Materials and Tools:
- Cardboard
- Pencil
- Cutting Knife
- Cutting Mat
- Elmer’s Glue
- Hot Glue
- Clear Tacky Glue
- Bowl or Cup
- Newspaper or Magazine’s Paper
- Water
- Brush
Measurements
Vertical Filing Section
• Bottom 1 = 10 x 10 1/2”
• Back 1 = 10 x 9 3/4:
• Sides and Dividors 4 = 10 1/2 x 9 x 2 x 6”
Paper Tray/ Horizontal Filing
• Back 1 = 9 x 11 1/2”
• Bottom 1 = 11 1/2 x 10 1/2”
• Horizontal Dividors 3 = 11 1/2 x 9”
• Wall 1 = Same as the dividers in the vertical filing section.
Pencil Holders
• Front and Back 8 = 5 x 3”
• Sides 8 = 5 x 3 1/4”
• Bottom 4 = 3 x 3 1/4”
Drawers
• Front and Back 12 = 3 1/2 x 2 1/2”
• Sides 12 = 9 x 2 1/2”
• Bottom 6 = 9 x 3 1/2”
Supply Organizer
• Back 1 = 12 x 10”
• Bottom and Horizontal Dividors 3 = 11 1/2 x 9 1/4”
• Sides 2 = 7 1/2 x 9 1/2”
• Drawer Dividors 4 = 9 1/4 x 2 1/2
You can combine the measurements of certain things depending on the pieces of cardboard you have at hand.
Process
Get The Pieces
The first thing you need to do is get all the pieces of your DIY in one place and cut up to the measurements.
I personally used a cutting knife and a mat because I found that it was easier to get through the cutting process with them. Remember to be super careful and request help if you believe that someone at home would be better at it.
You could also use scissors though they may make this process more time consuming and arduous.
Gluing
I’m going to be telling you how I glued everything but there’s something to keep in mind in the midst of putting together the organizer.
You need to glue up to the point that it won’t keep you from being able to put the mache paper over it. You can save yourself this thought by just cover everything in mache paper before gluing the pieces together.
For the ones who don’t know, mache paper is made with water, glue, and paper. I used a brush to apply the water and glue to the pieces of cardboard instead of soaking the paper in it because it was just neater at the end of the day.
We’ll go from difficulty levels upward though nothing was really difficult when making this DIY desk organizer.
Vertical Filing Section
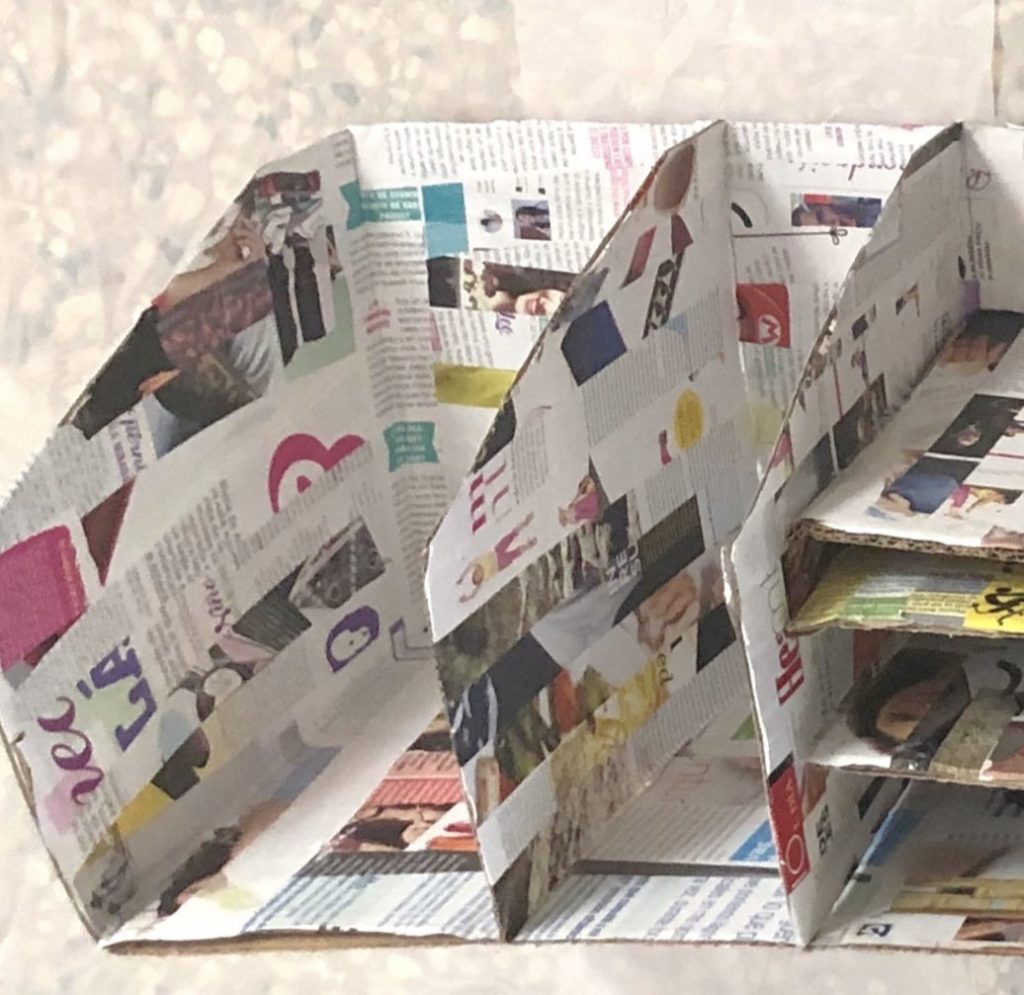
If you had different backings and bottoms for each section you want to glue them first and add the walls (sides) to keep them together.
After getting the body together, draw a line at six inches and then at four inches from there to put the vertical dividers there and glue them down.
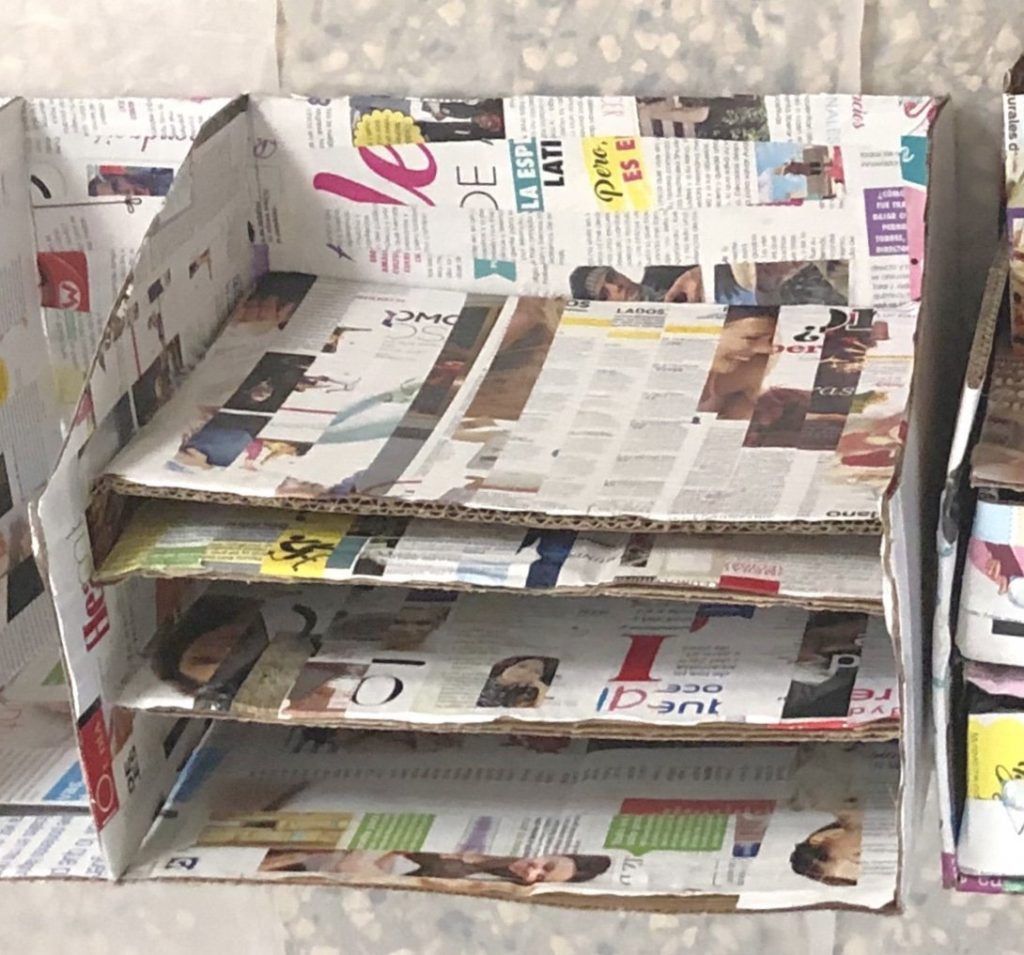
Horizontal Filing Section
You want to do the same thing with the back, bottom, and sides.
Now you just mark where you want to put the horizontal dividers which in my case were put two at 2” spaces and one at 1” spacing.
Supply Section
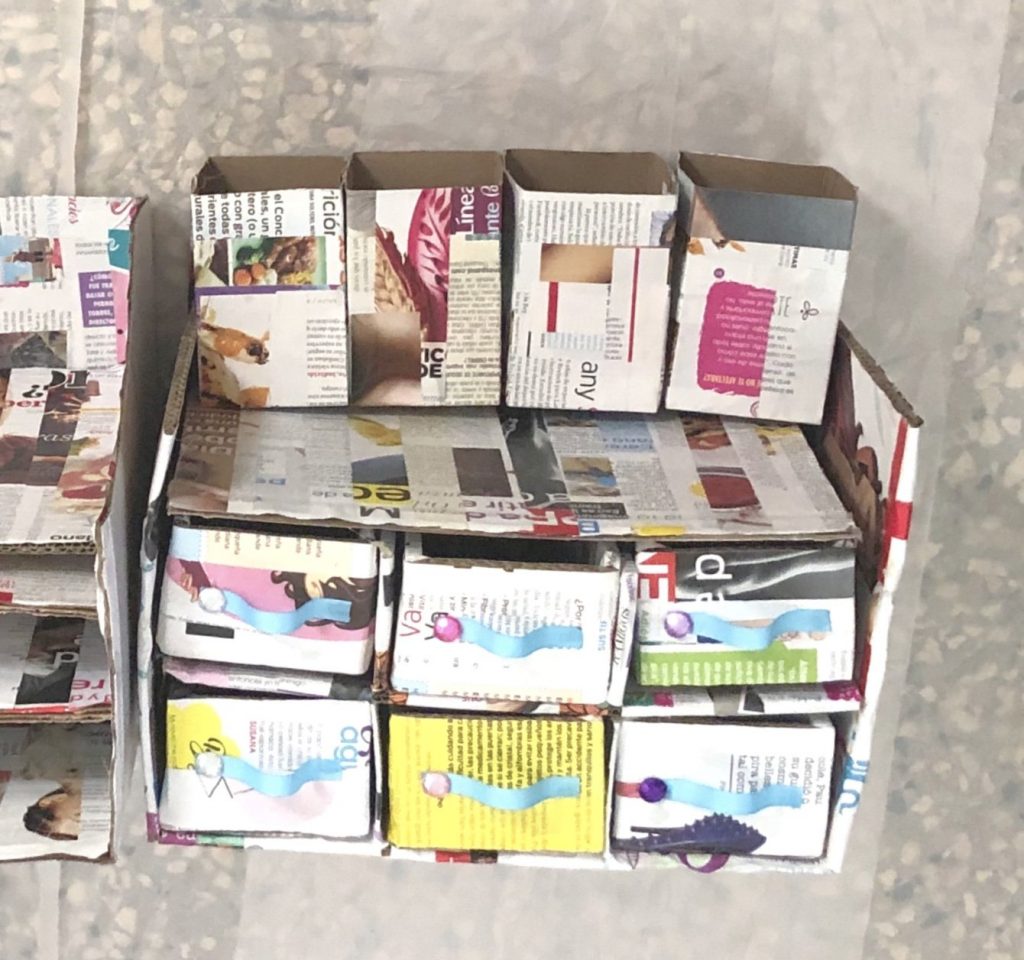
Pencil Holders
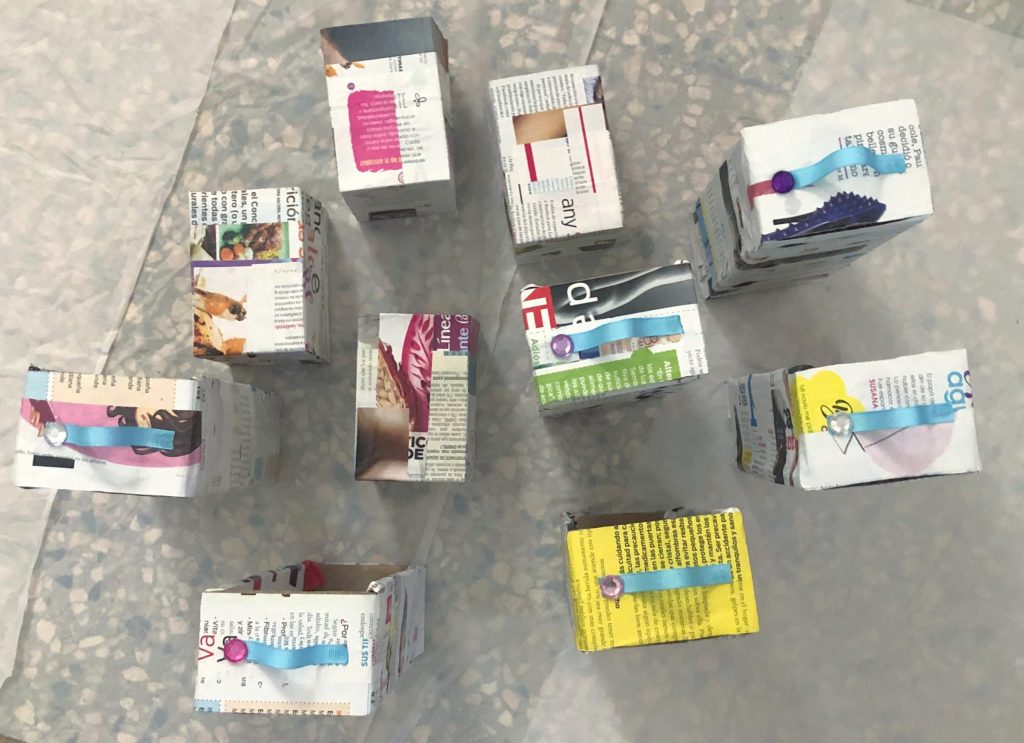
You then take the sides and cover and glue them together and add the bottom to the square formed by the union.
Drawers
The same thing that with the pencil holders; sides to covers and bottom at the end.
Supply Section Body
Glue the back to the bottom and add the walls to keep it together.
Then, you want to add the first layer of drawer dividers to the bottom and add the horizontal dividers on top.
The other two drawer dividers and the top to finish it off.
I let the pencil holders at the top loose so that I can take them individually as I see fit but you could also glue them down.
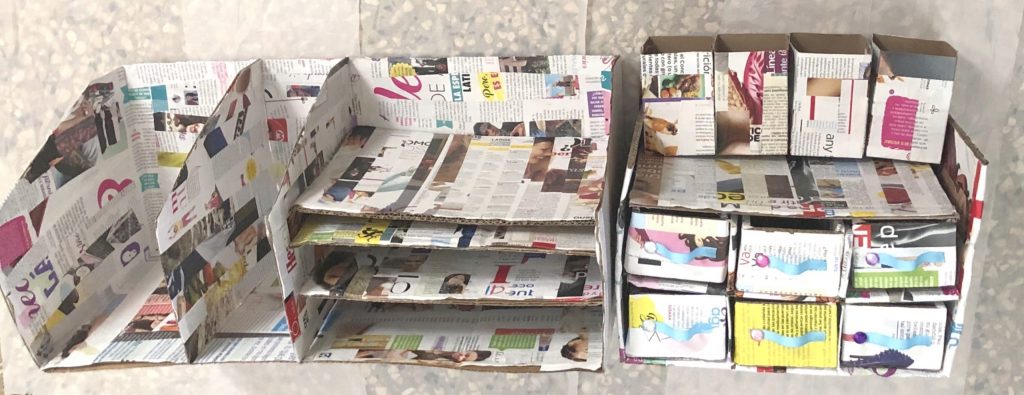
You may see in the pictures that not everything is properly glued and that’s because I… (sorry this is hard to admit)… I… Ran out of glue! I said it! I didn’t just run out of hot glue, I ran out of every type of glue I had at home which is embarrassing for someone like me who plans and is always prepared to admit.
I still can’t believe that I didn’t have a backup for each type of glue but hopefully that’s soon to change.
If you have any questions regarding this DIY, feel free to let me know in the comments section and I’ll do my best to help you out.
I’m so excited to reorganize my stationery and put this whole DIY desk organizer to good use.
I hope you liked this DIY and found it helpful. Comment down below if you’ve ever done a DIY like this before to organize your stuff.
If you want to see more content like this, make sure to subscribe to my weekly email newsletter and check out my social media.
Be Yourself, Be Happy, Be Human.
Lots of Love, Patrick.

No, Chiji, you can do it! Use cheap paper for practice and don’t worry about wasting it. This is art practice–you deserve a couple extra sheets of paper! If you are really worried about waste, you can use scrap paper for practice (you can cut squares from old junk mail letters, the unwrinkled parts of paper bags, unused sheets of paper from old school notebooks, and so on)
I love using old scraps of paper and recyclable supplies for my crafts. It gives them a unique look. Not so long ago I made a post on How to Make Stationery Supplies from Old Composition Notebooks.